Canva is an easy-to-use online graphics application that has free as well as premium subscription options. It's a great way to get started creating images for your business and helping your clients. Templates are available to help you get started creating everything from Facebook post images to YouTube thumbnails and even logos.
In the past, we've covered how to create a Facebook Post Image using a Canva template. Today, we'll look at how to edit/adjust images in Canva. This is particularly useful when placing and aligning images in templates such as the one shown on the YouTube thumbnail below.
Steps to Position Your Image in a Canva Template
From your Canva account, select the template you want to use.
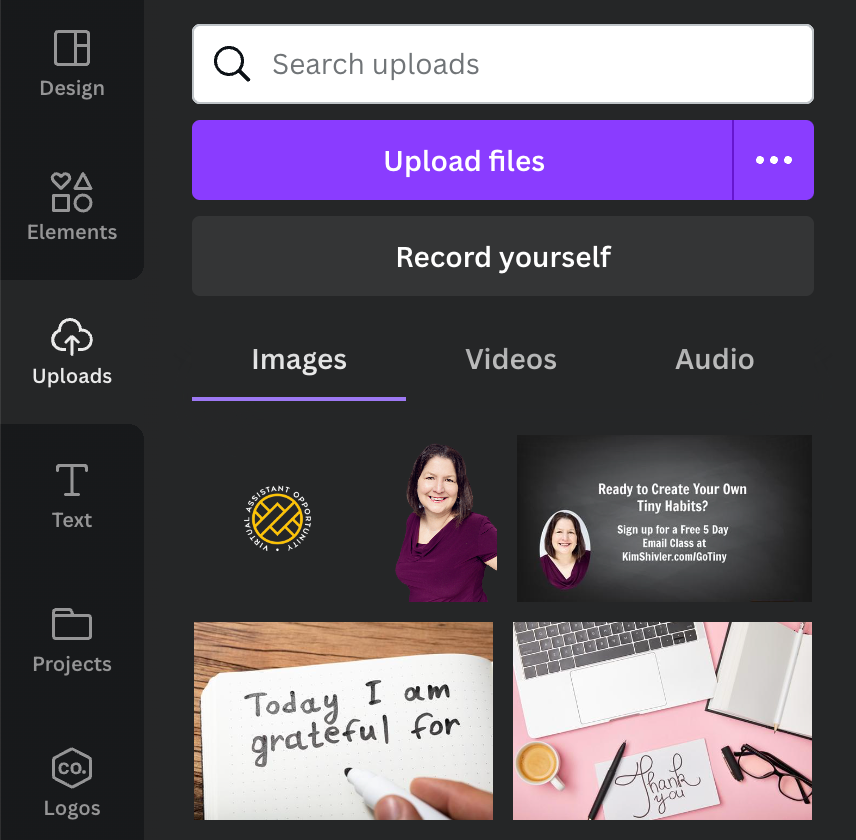
To change images, you can select from one of the many template images, or use one from your Uploads. In this case, we're going to use one of my headshots from Uploads.
When you grab the image you want from uploads and drag it over the image in the template, your image will replace the template image.
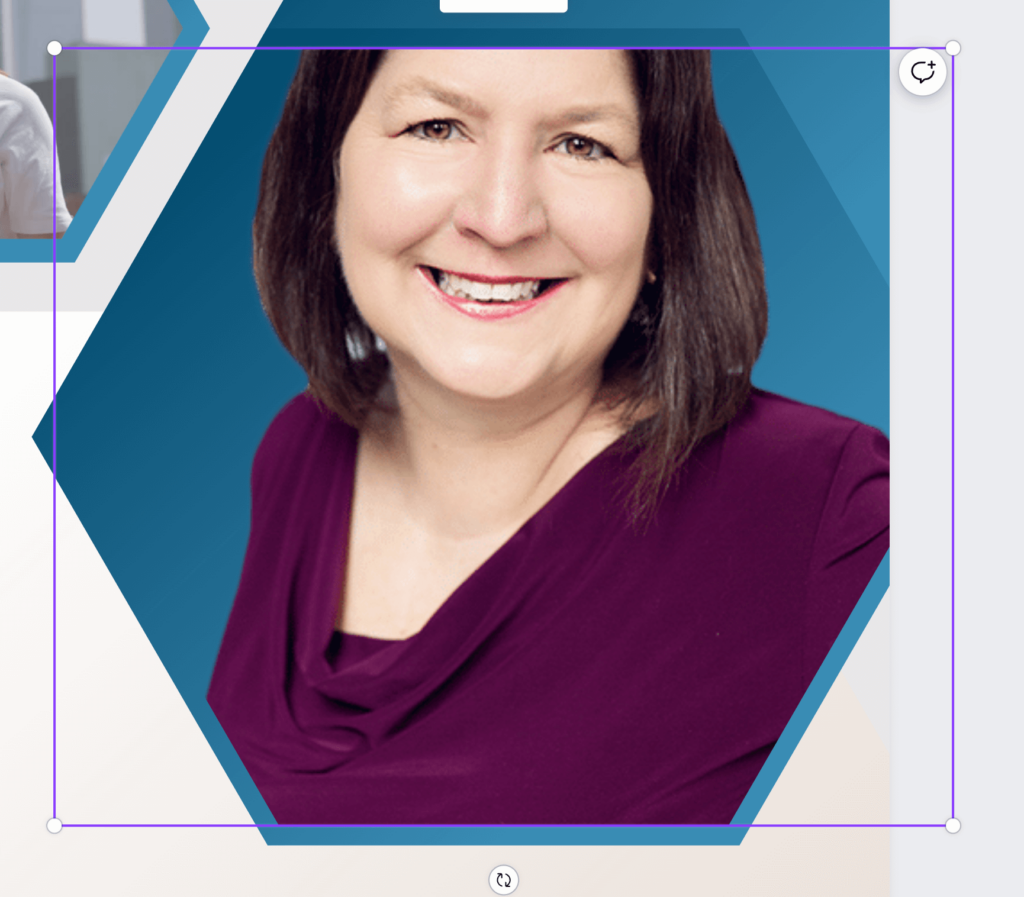
One of the nice things about this feature is that if the image is in a shape such as a circle or oval, your image will fit into that shape. The challenge is that sometimes it doesn't align properly. For example, your face might be partially cut off.
If your image doesn't fill the space appropriately, click on the image in the template. This opens the Edit Image option menu.

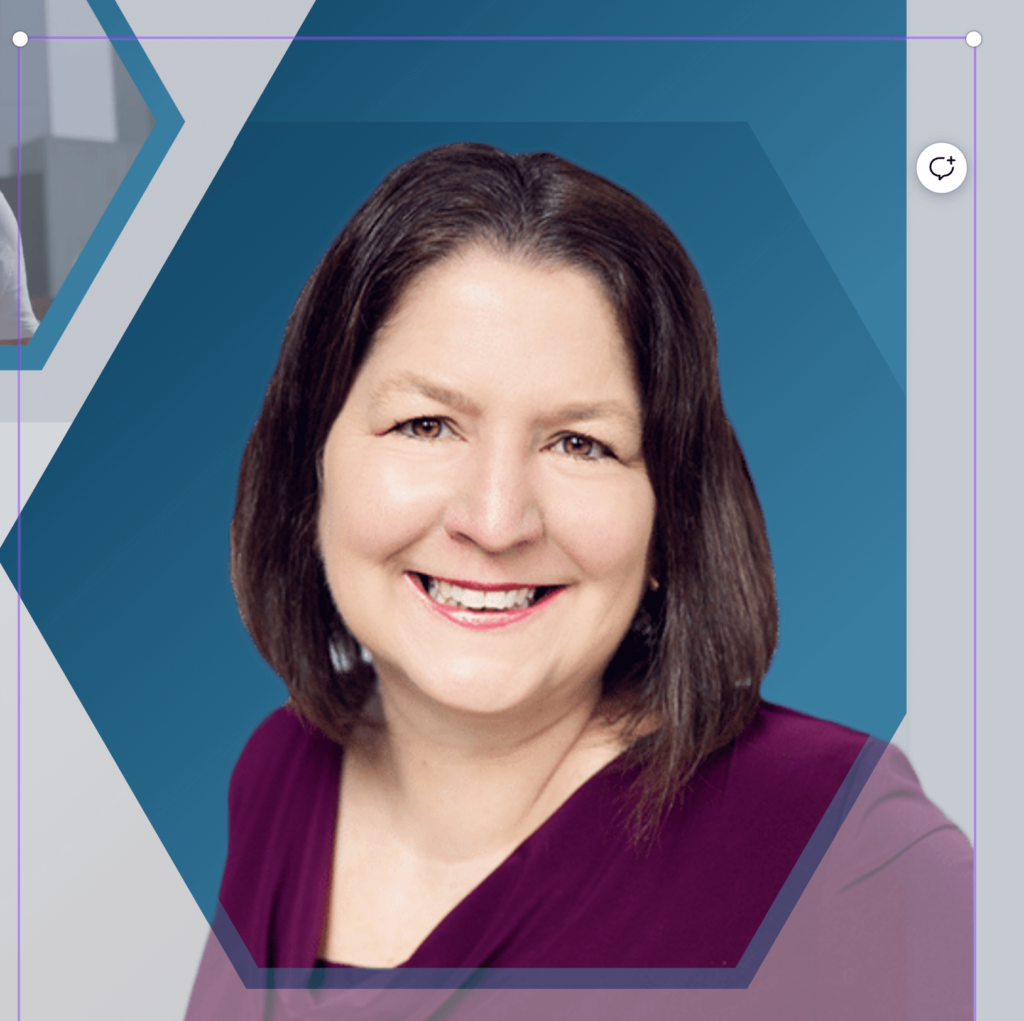
To position the image in the template, select Crop. This allows you to click on the image and drag it so that it fits within the template shape properly.
You can then add any text or additional images to complete your Canva image and post on social media, blogs, or wherever you need it.
Transcript of How to Adjust an Image in Canva
(00:00):
Hey everybody, it's Kim Shivler. Welcome. You may have heard me talk about Canva. That's C A N V A.com. It's an online graphics creation and editing tool that I'm absolutely in love with. It makes graphic creation for your blog posts and your website featured images, et cetera. So easy, I love it. This is one other of the little mini videos. I've been doing some short videos, two to five minutes, just about some of the features within Canva. I'm also linking to their training because of course, they have a lot deeper training on more functionality, but I've been trying to get to the guts of some of what you might want to use both for yourself and for your customers. So, For example, if you're helping your virtual assistant clients or as a virtual assistant, if you're helping your clients create Facebook posts or Instagram posts, this is a great way to create those quickly.
(01:17):
I have another video on creating a Facebook post. I will be linking to that. And in this case, I have used the information I showed in the last one to grab a template and create a Facebook post. Today, I just wanna give you a quick tip on positioning images. So you'll notice that within this template, they've got an image and it's already got this great shape around it. And believe me, if you've ever worked with a large graphics tool or you're trying to get different types of shapes with your pictures, it can really be painstaking, and you want to pull your hair out to get it done. Canva makes this easy. So the template was there. I added my text. I did change a few colors, which I've also shown in other videos. And I now want to add my image here because I have this little, join this Lunch and Learn with your guide Kim Shivler text.
(02:32):
So I wanna put my picture here. Over on my left side, these are my options for templates and elements, text, and different projects. These are all the items that are, make it easy for me to find things and add them into my project. I've already clicked on uploads. These are images I've already uploaded, and I keep them in my account so that I can use them and reuse them as we go along. So what I want to do is I wanna put my picture here. So I'm gonna, over here under uploads. I'm gonna click on the picture. Now, you'll notice kind of places it in the middle. That's not where I want it. I want it to fit into the shape that they have laid out. So I'm gonna click on it with my mouse, hold it and drag it there. Perfect. Now it's got the shape.
(03:29):
Well, not maybe a hundred percent perfect because it is cutting off the top of my head. So what do I wanna do to fix that easily? I'm gonna click right there on the picture and notice that up here at the top, we have edit image, crop flip, which would flip it around animate, which we're not worrying about right now. If we edit the image, we can actually remove backgrounds and change different items. But again, for today, that's not what we're working on. We wanna go really simple. I just wanna move this so that it's moved down and my head's not cut off. If you have ever worked with traditional graphic programs, this is where it might throw you a little bit in Canva. We're gonna click on crop. So normally crop is uh, if you are, say in Aho most photo editors and you clip crop, you're going to scan down and cut the image down.
(04:37):
That means cropping the image, and cutting it down to a different size. In this case, we are gonna crop the image, but we are actually using it to position the image. And that's why sometimes, for people who've had a little bit more graphics experience, this option is a little more confusing. So I've come here under the crop and what I'm gonna actually do is just grab this, move it down. Yes, I'm happy there with it. It is gonna crop this image to that size, but it's a combination of cropping and positioning as opposed to just, whoops, I'm cropping these off. And the size changes. In this case, we are gonna crop it to this size, but we've positioned the image so that my head's not cut off up at the top so much. Now I'm gonna just click up here on done and notice I now have a little bit better picture of myself. As you move forward, you may want to find different pictures to what scale's right, but I'm, I'm comfortable with this. I'm okay with it, with what it is perfectly centered. This is going
(05:56):
To be my Facebook post for my upcoming live webinar. The big key for this lesson was for you to learn that you can click on that image, click on crop, and that actually allows you to position it within the area laid out by the template. As always, if you have questions, drop me a line, fill out a contact form. I look forward to hearing from you. I'll see you next time. Bye.
Helpful Links for More Information on Canva
Explore Canva's Getting Started Tutorials to Jump Start Your Progress in Canva
Check out the tutorials and topics in the Canva Learning center. Login to your account and click on the Learn option in the top menu.
