
When you see blog posts listed on websites, you’ll note that there is frequently an image associated with the post. These may be displayed in a list or in a grid format. In this section, we’ll learn to create a featured image and add it Featured Image to a WordPress blog post.
This post is part of a Basic WordPress series that covers common services for Virtual Assistants to provide and covers the tasks that my VAs help me with. Other articles in the series include How to Create a WordPress Post.
To create the image, use your favorite editor. Canva and Picmonkey are popular low-cost options. Note that sometimes your client will provide the tool they require because they may have templates in place for you to edit. Note that image sizes can vary depending on the WordPress theme your client is using, so you'll need for them to provide this information. Very often, they have a template for you to edit so you will need to add text and sometimes other images but not start from scratch each time.
How to Create a Featured Image From a Template in PicMonkey
In the current case, my Virtual Assistants are using PicMonkey to edit a template and create a featured image. Here are the steps.
- Login to PicMonkey.
- Select the Template file for the Featured Image and select Edit a Copy.


- Change the text to reflect the title of the blog post you are creating.
- Change the name of the image to reflect the current blog post.
- Download the image to your computer, then upload the image into your WordPress blog post.
How to Upload a Featured Image to a WordPress Blog
- Login to the WordPress site where you want to upload the image.
- From the Dashboard select Posts and open the Post or Post Draft where you want to place the image.
- Scroll down until you see the Featured Image upload box on the far right side of the screen. This is the area where you find your post options like Publish and Draft that is to the right of the actual Post content window.
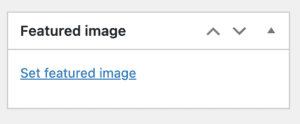

- Click on the Set featured image link
- Upload the image you want to use as your featured image. Note that this is the same as uploading any other WordPress image.
- Add your Alt text.
- Save the file to upload and place it as your featured image.
- Remember to save your blog post as either a draft or Publish it. If you leave the page without saving, you'll lose your changes.
- Are you interested in more options for creating and editing blog post featured images? Do you have questions? Let me know in the comments.
Transcript of How to Create a Featured Image and Add it to a WordPress Blog Post
(00:00):
Hello, virtual assistants, It's Kim Shivler, welcome back. We are in the process of building blog posts, and one of the things blog posts have is what's called a featured image. This is where let’s see, let me go look at a couple of different websites. If I go look at this website, this is mine on WordPress. See these, these are the featured images. So, when they show up in a listing, you're going to see it and that's a featured image. So, we want to learn to create a featured image to add it to a blog post. So, this is my blog post. I've got to add a featured image. Now, I have, for me personally, I have two types of featured images. One is kind of like this, where I kind of have they're mainly text-based or maybe there's one screengrab down here you say, or if you look at my, one of my general business sites, you'll see that these have more, you know, I'm getting these out of what's called stock photography, and then I'm adding them as we go.
(01:17): Editing Your Image in PicMonkey
For example, here, I took a stock photo and I added it, edited it, excuse me, I added some text to it. So, a little bit depends on what we are doing. In this case, I'm going to go ahead and stick with just a basic text info post so that we can do it kind of quickly. I'm coming back to PicMonkey, and you all know PicMonkey is where I edit most of my videos. I'm going to come back here to close this out, and I'm going to come here under post featured images, and I'm going to select one of these as my template. Now again, when we teach you how to make things in PicMonkey, you'll see how to do it by scratch. You'll see how to add other information, but, for right now we're going to go pretty simple. Also, know that if you are working with a customer and they don't have this setup, you need to know what they need as their featured image size.
(02:34): Image Size for a Blog's Featured Image
Mine is 300 by 300 for my blog's featured image. But if you're going to create featured images for people, you, and they don't have a template like this, you need to know their size. I'm going to go ahead and click on this and edit a copy. And edit a copy. I'm naming the copy Incognito, I'm going to just name it for now, and I've got the how to here. I'm going to put How to Use Incognito. Now, I could put how to use it for one thing or the other, all those different stuff and then I just, did you notice that went way out here? I grabbed it and I dragged it and we're just going to name this one, How to Use Incognito, that works for me. At this point, if you watch the thumbnail, you'll understand what's about to happen. I gotta download this. Now my PNG is 65k. I have a feeling that's probably the best deal. Yeah, so, I'm going to just go ahead and stick with my PNG image and download that. Now that's going to download down here to my hard drive, where I can now configure it to upload it, and use it as my featured image. That is the very, very basics of using a template to create a featured image. I'm Kim Shivler. I'll see you next time. Bye.