
Many people are used to uploading images in order to share with people online. Sometimes services that deliver your images, for example, services delivering your Email Signature, may require that you copy and paste image links to display images online.
At first glance, this seems a little daunting, but once you understand it, it's quite easy.
Image Links versus Uploaded Images
Many people are familiar with uploading images to social media, attaching as an upload to email, or uploading to your file organization platforms like Dropbox and Google Drive.
When you upload an image, it is actually stored on the server where you upload it. This takes up space on that server. Think of your own hard drive. When you save files, they take up space, and hard drive space costs money. This is one of the reasons many services ask you to link to your images instead of uploading them. In these cases, your images are saved on one of your online available platforms like Dropbox or Google Drive.
When people see these images displayed, for example, in an Email Signature, they are viewing them as links from your file storage, not the storage of the company that helped with the initial formatting of the layout.
At the core, this is basic HTML – the language for creating websites. When a web page shows images, it actually links to those images. They are not contained within the file the way they might be when uploaded into a graphics or word processing application.
When we look at services delivering fancy layouts online, like the Email Signatures we have discussed, they are providing you an easy-to-use interface that lays out the underlying HTML for you.
Why Does a Virtual Assistant Need to Know How to Copy and Paste Image Links?
At the most basic, you may need this for your own marketing needs. As mentioned above, many of the Email Signature Generators ask for the link to any images you want to display.
Secondly, when configuring marketing products for your customers, you might come across this requirement, so having a resource to help is very valuable.
How to Copy a Link in Dropbox
If you are using Dropbox to manage your files, you are uploading files to their servers. These can then easily be synced between devices like your desktop. laptop, and Dropbox account and can provide links to the images for rendering online.
Initially, you'll need to have an image uploaded to Dropbox.
Navigate to the image whose link you want to copy in your File Manager, if synched with Dropbox, or Dropbox account.
Right-click on the image and under the Dropbox Quick Links, select Copy Dropbox Link.
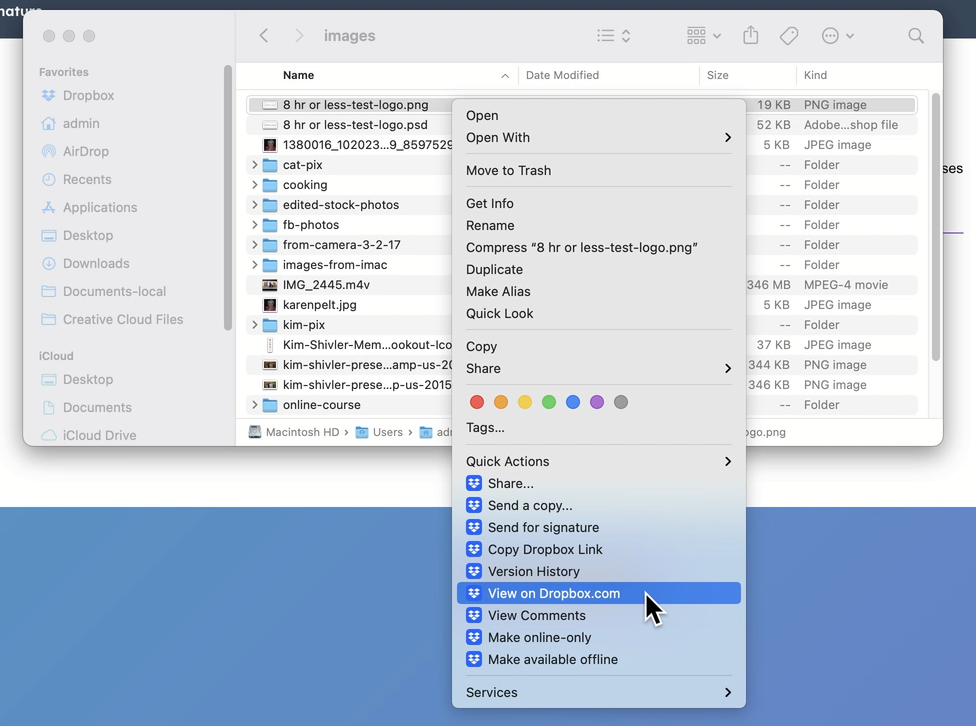
Go to the area where you need to paste the link and paste it there. You should now see the image displayed.
How to Copy a Link in Google Drive
As with copying a link from Dropbox, the first step is to upload an image to your Google Drive.
Click on the Link, and on the right side, select Manage Access.
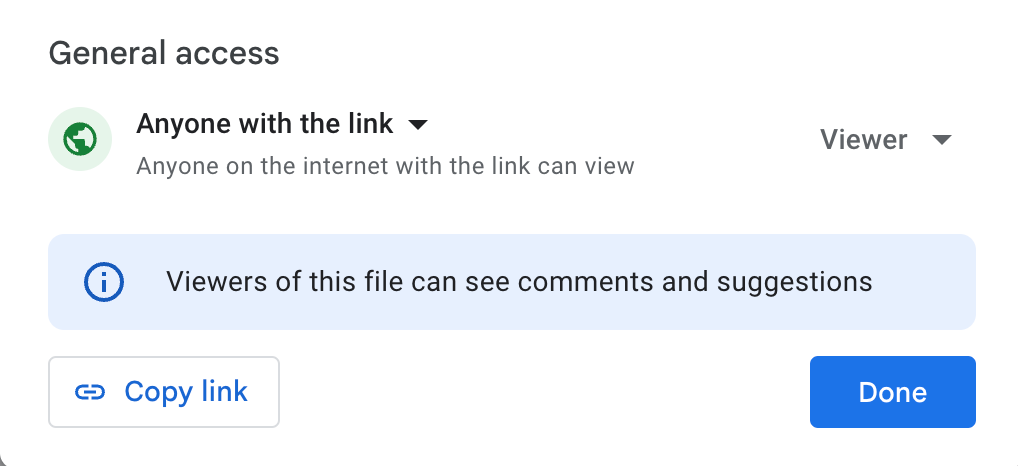
Click on the Copy Link button.
You will need to change the settings to allow people with the link to view the file; otherwise, you will get an error.
Click the Done button to save your settings.
Navigate back to the appropriate field and paste your link.
How to Copy a Link in WordPress
If you are using WordPress for your website, you may already have your image uploaded there. For example, if you need to copy your logo, it is probably in your WordPress.
Login to the Administration Panel of your WordPress website.
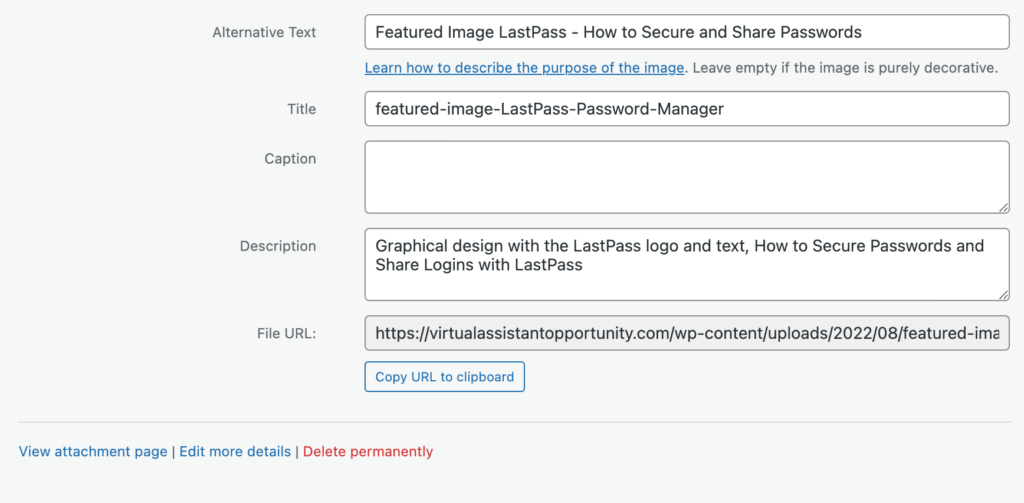
On the left side menu, select Media. This opens your media library.
Search for or scroll to the image you want to use, and click on it to open the image.
On the left-hand side, you will see an information box with the image title, alt text, file URL, and other information. Click on the Copy URL to clipboard button.
Navigate back to the appropriate field and paste your link.
Very Important – Don't Move or Delete Linked Images
Once you have linked images, it is very important not to move or delete those images or people will see a broken image icon instead of your image. Remember, the image shown is just linking to your file. It is not uploaded into the area where they are viewing.
Organizing your files properly can help you both avoid broken images and understand what is linking to which image and from where.
Recommended Process for Tracking Linked Images to Make Sure You Don't Delete Them
One easy way to organize your linked images to keep them safe is to create a specific directory where you save images for linking. This is very easy to do if you are linking from Google Drive or Dropbox. If you are linking right to your WordPress site, it doesn't apply however you could still create the master file to document what you have linked and where.
- Create a directory. I call mine Linked Images.
- Add copies of the images you want to use as links to this directory.
- Create a master document, for example, a Google Sheet or Microsoft Excel sheet, and document the image name, image links, and the location where you are sharing these.
Configure Processes to Help Your Customers Preserve Their Linked Images
If you need to use image links when working with customers, help them understand the process to keep these images safe, so they don't get moved or deleted. If you like the process described above, explain it to the customer and recommend that you configure this as part of the job.
Linking to images online is a skill that seems a bit daunting at first, but once learned is easy and can help you with your own work as well as client work when configuring online tools that require linked images instead of uploaded images.